D-Link Router Access Point Configuration: A Comprehensive Guide
Are you looking to extend your wireless network coverage and improve signal strength in your home or office? One effective way to achieve this is by configuring your D-Link router as an access point. In this article, we'll walk you through the process of setting up your D-Link router as an access point, ensuring a stable and reliable wireless network.
What is a Wireless Access Point?
A wireless access point is a device that extends your existing wireless network signal, allowing more devices to connect to it. It essentially acts as a repeater, receiving the wireless signal from your router and retransmitting it to devices within its range. This setup is ideal for areas with weak or dead spots in the wireless coverage.
Requirements for D-Link Router Access Point Configuration
- Make sure your D-Link router is configured and set up as the primary router.
- Connect your computer to the D-Link router using an Ethernet cable.
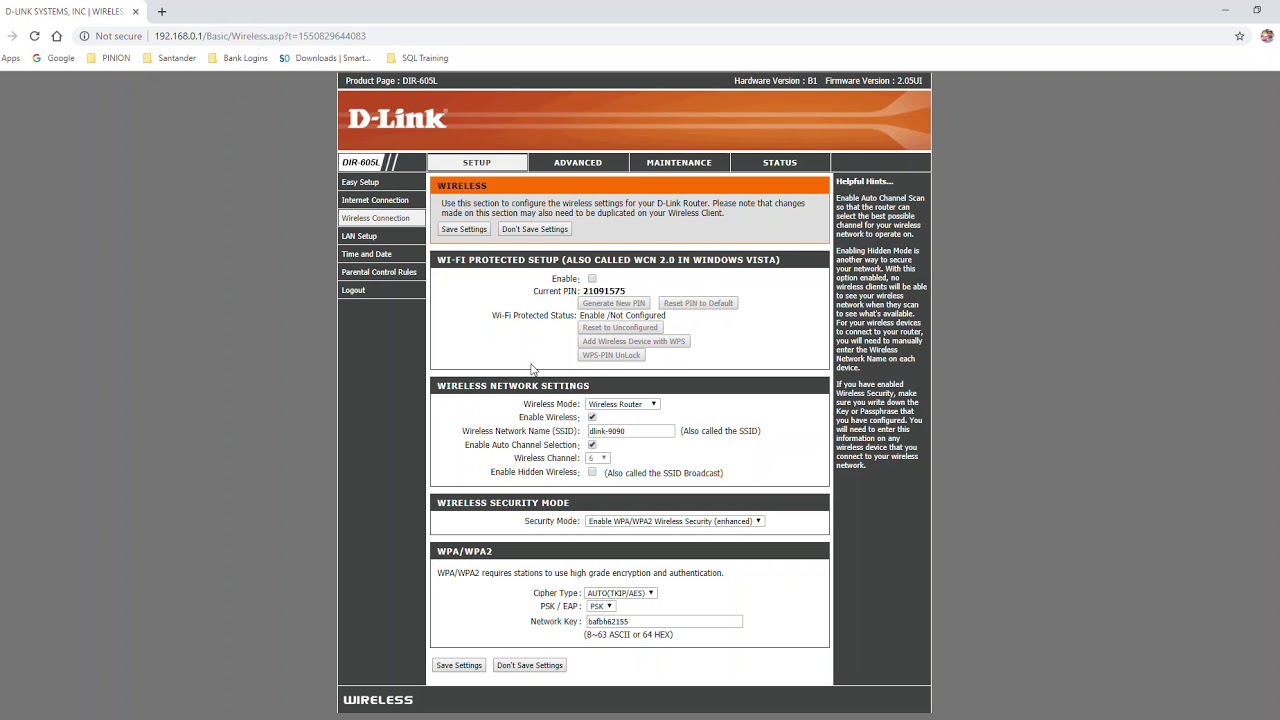
- Launch a web browser and access the router's configuration page (default IP address: 192.168.0.1).
Step-by-Step Configuration
Log in to the D-Link router using your administrator username and password.
Navigate to the Wireless Settings page and select the 2.4GHz or 5GHz wireless band, depending on your needs.
Click on the Wireless Settings button and select Access Point mode (AP mode). This will allow the D-Link router to function as a wireless access point.
Configure the Wireless Network Name (SSID) and Password (WPA2 or WPA3), making sure it matches your primary router's settings.
Set the Channel Width to 20MHz or 40MHz, depending on your network traffic.
Save the changes and reboot the D-Link router to apply the new settings.

 I S M TECH")


