Setup a G Wi-Fi Network for Guest Access: A Step-by-Step Guide
Are you tired of sacrificing security for convenience when hosting visitors? Look no further! Setting up a separate G Wi-Fi network for guest access is a great way to provide internet access to your visitors while keeping your main network secure. In this article, we'll walk you through a simple and easy-to-follow guide on how to set up a G Wi-Fi network for guest access.Why Do You Need a Separate G Wi-Fi Network?
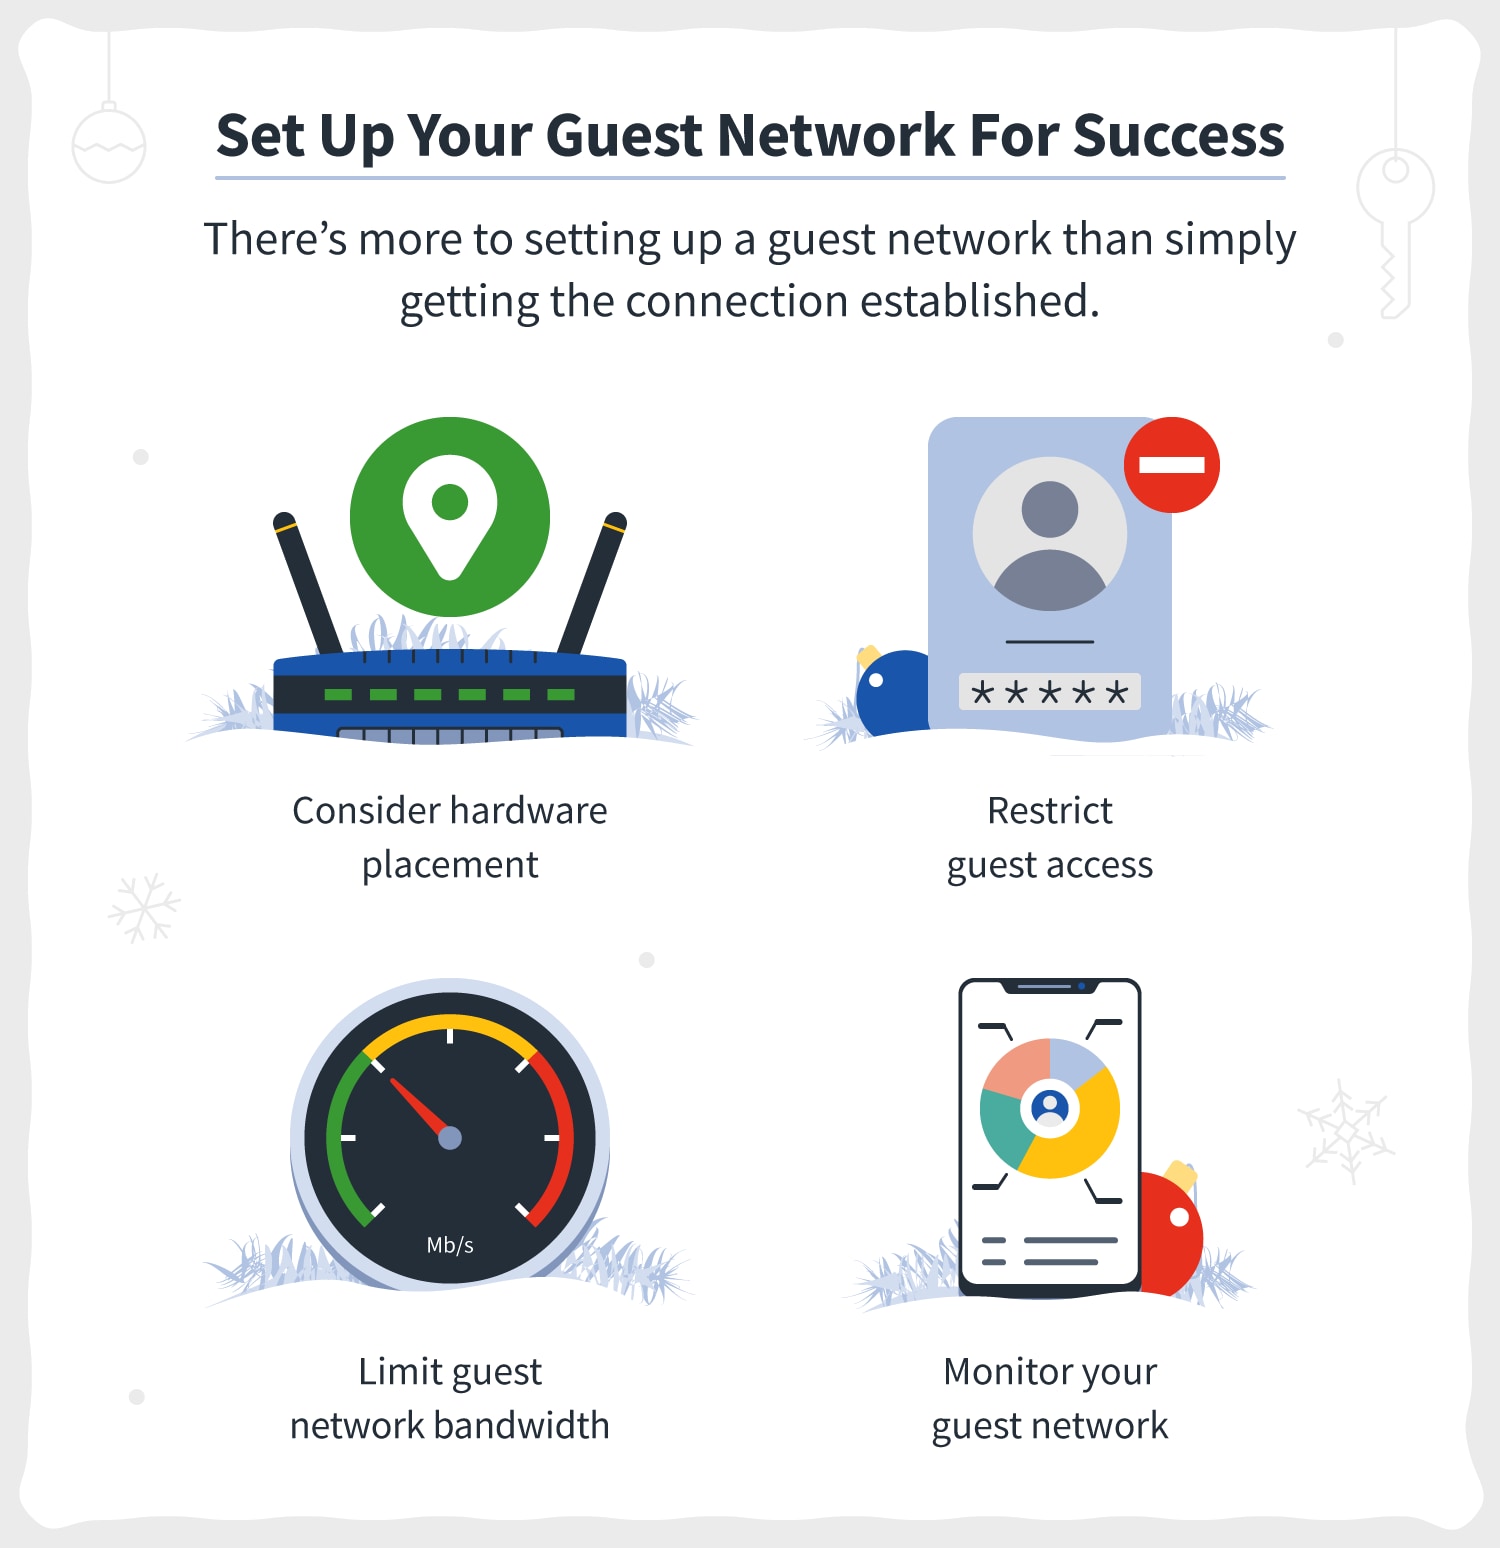
Guest Wi-Fi networks are designed to provide a separate internet connection for visitors without compromising the security of your personal home or business network. By setting up a guest network, you can share your internet connection with visitors without revealing your primary Wi-Fi password, files, or devices.
How to Set Up a G Wi-Fi Network:
Setting up a G Wi-Fi network is a relatively straightforward process that can be completed in just a few steps. Here's a step-by-step guide to help you get started:
- Step 1: Check Your Router's Capabilities - Ensure that your router is compatible with a guest network and has the necessary features to support it.
- Step 2: Log In to Your Router's Interface - Open a web browser and enter the IP address of your router to access its interface. The default IP address is usually 192.168.0.1 or 192.168.1.1.
- Step 3: Enable Guest Network Feature - Look for the guest network option and enable it. You may need to click on a sub-menu to access the guest network settings.
- Step 4: Configure Guest Network Settings - Set a separate IP address pool for the guest network to prevent guests from accessing your internal network resources.
- Step 5: Create a Unique Guest Network Name and Password - Create a unique name and password for the guest network to prevent unauthorized access.
")

![How to Set Up a Guest WiFi Network [Step-by-Step Guide] - Reolink](https://stevessmarthomeguide.com/wp-content/uploads/guest-network.jpg "How to Set Up a Guest WiFi Network [Step-by-Step Guide] - Reolink")


