G Network Settings for Different Carriers: A Comprehensive Guide
When it comes to using your Android device with a different carrier, it's essential to understand how to adjust your network settings. In this article, we will explore the G network settings for different carriers and provide a step-by-step guide on how to switch carriers and adjust your network settings.
Why Adjust Your Network Settings?
Adjusting your network settings allows you to switch carriers, choose a specific network mode, and customize your data usage settings. This can be especially helpful if you're experiencing issues with your current carrier or want to take advantage of better coverage and speeds offered by a different carrier.
Step 1: Access Your Network Settings
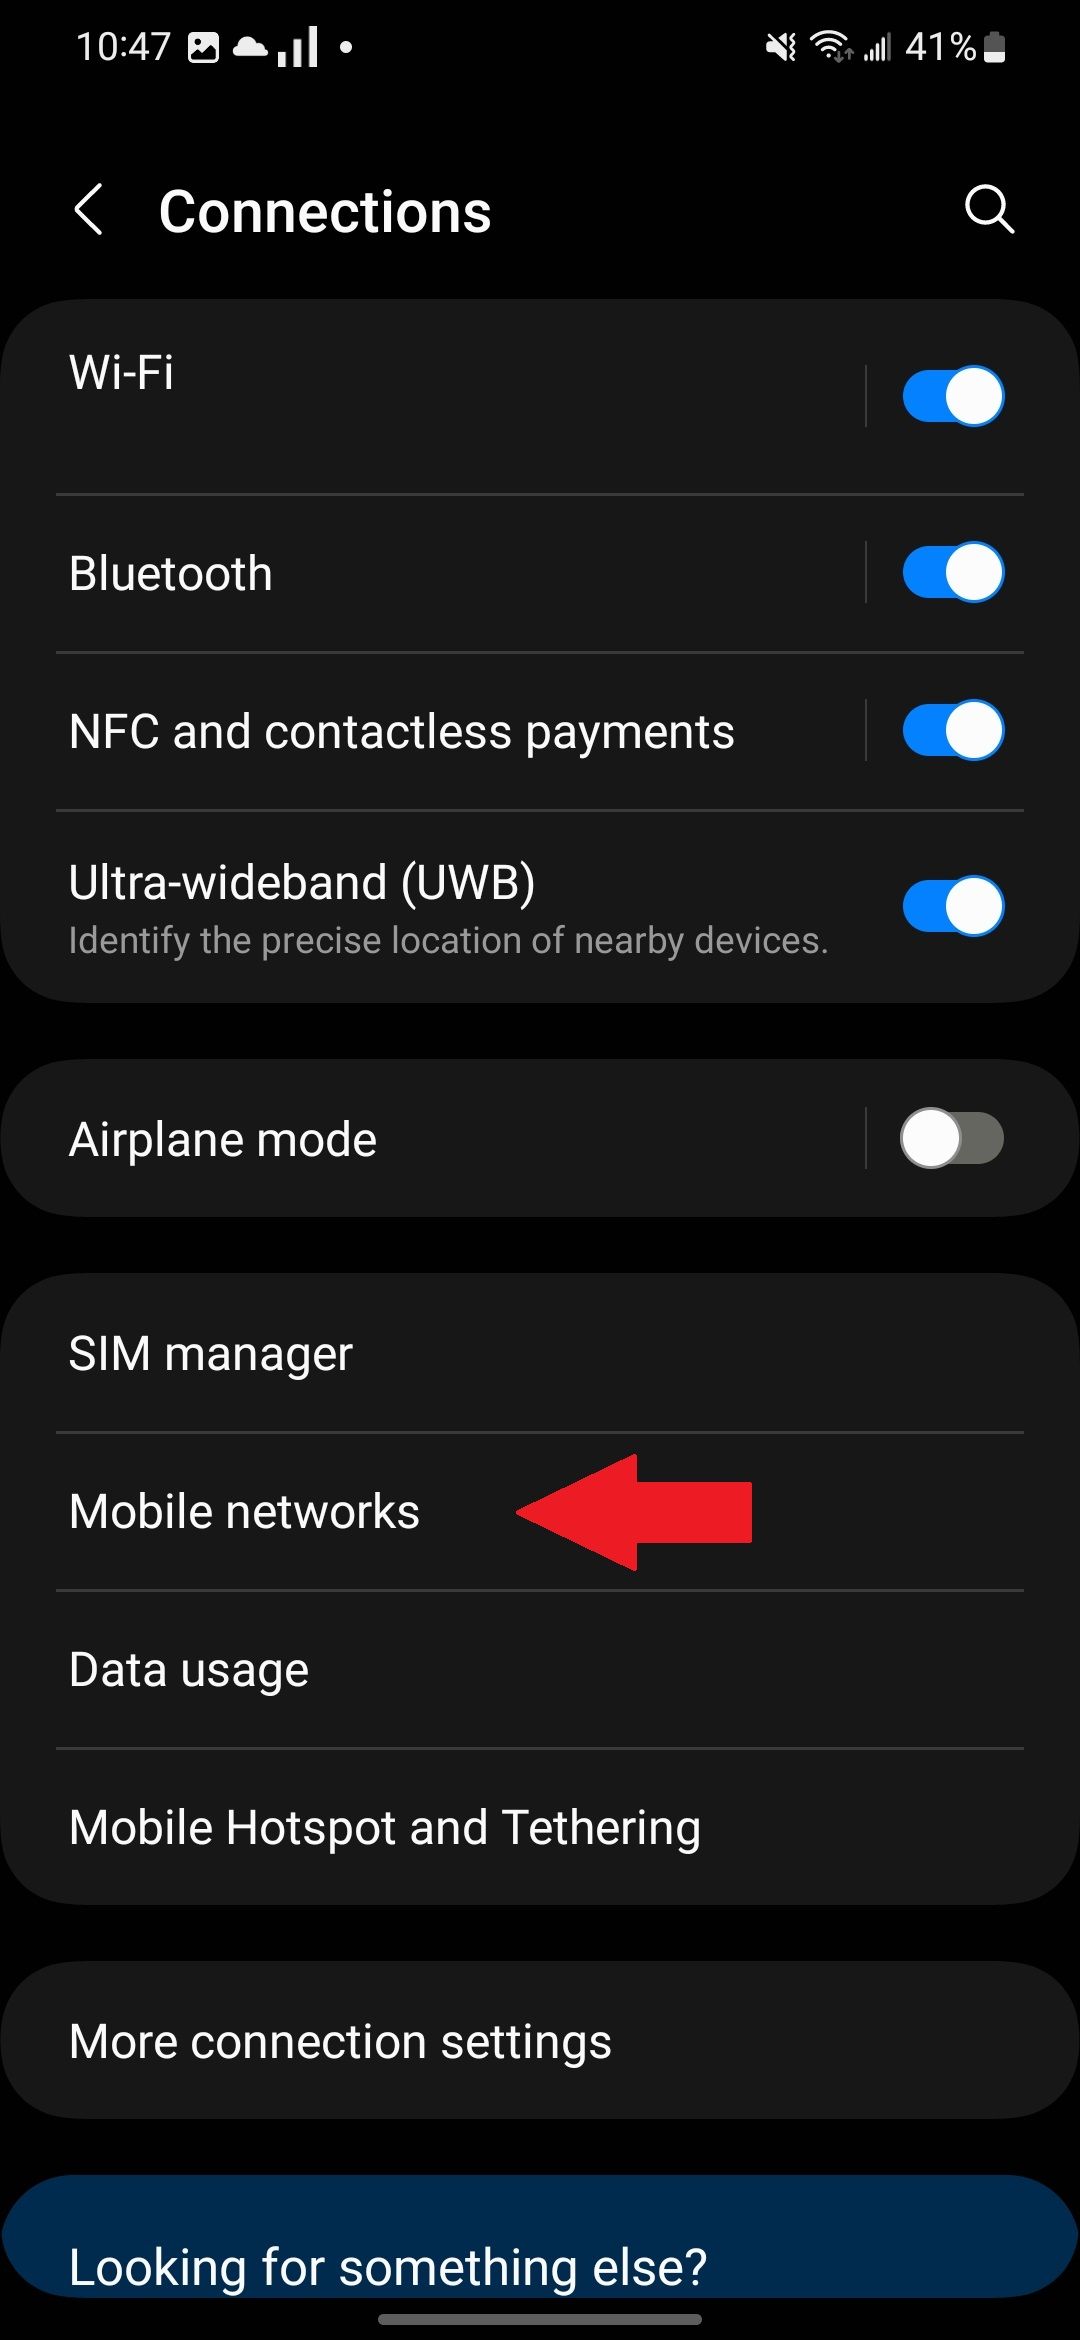
To access your network settings, follow these steps:
- Swipe up to open the app drawer and locate the Settings app.
- Open the phone's Settings app, which is the control center of connectivity.
- Go to Connections (or a similar name) to see network settings.
- Open Mobile Networks, where SIM and carrier settings are managed.
- Go to Network Operators or Network Selection, the key menu to choose a supplier.
Step 2: Choose a Carrier
Once you've accessed your network settings, choose the carrier you want to use. You can do this by selecting the carrier from the list of available carriers. If you're switching carriers, you'll need to update your APN (Access Point Name) settings as well.

")


 - Change Network Mode - Verizon")


