Drywall Texture Matching Techniques: A Complete Guide
Introduction
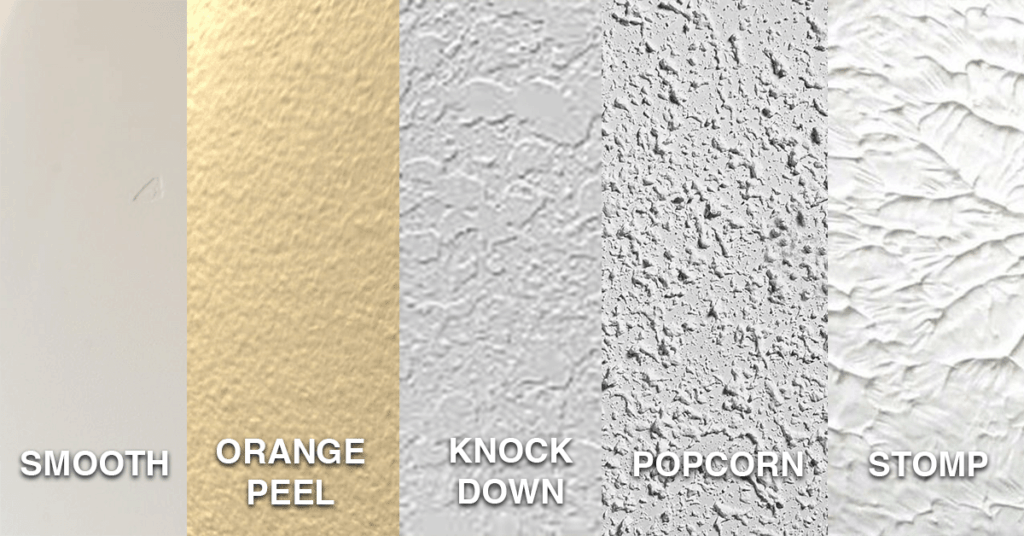
Matching wall texture after plaster repairs can be a daunting task, but with the right techniques and tools, it's achievable. The goal is to blend new texture with existing walls so that the repaired area looks seamless. In this article, we'll delve into the world of drywall texture matching techniques, covering the importance, tools, and steps involved in achieving a flawless finish.The Importance of Drywall Texture Matching
Achieving a perfect texture match is crucial for a seamless finish. When repairing drywall, it's essential to blend the new with the old so that it's virtually undetectable to the naked eye. A well-matched texture adds value to your project, making it look professional and enhancing the overall aesthetic of your space.Tools and Materials Needed
- Texture spray or texture gun
- Drywall knives (different sizes)
- Drop cloths or tarps
- Trimmer or sanding block
- Spray texture (various types)
- Paint company textures (for reference)
Preparation is Key
Before you start, it's essential to prepare the surface. Here are steps to follow:- Inspect the area: Identify the existing texture pattern and thickness.
- Clean the surface: Ensure the area is free of dust, debris, and any old texture.
- Remove any old texture: Use a drywall knife or sanding block to create a smooth surface.


:max_bytes(150000):strip_icc()/GettyImages-1253112119-fab7c3a83bed48499041241bf430e462.jpg "How to Paint Over Permanent Marker on Walls")


 - ZipRecruiter")


