Configuring Router for Security Cameras: A Comprehensive Guide
Installing security cameras is an excellent way to enhance your home or business security. However, to ensure seamless surveillance and remote monitoring, it's crucial to configure your router correctly. In this article, we'll provide a step-by-step guide on how to configure your router for security cameras, covering the basics of setting up a network, configuring port forwarding rules, and optimizing your router's settings for optimal performance.
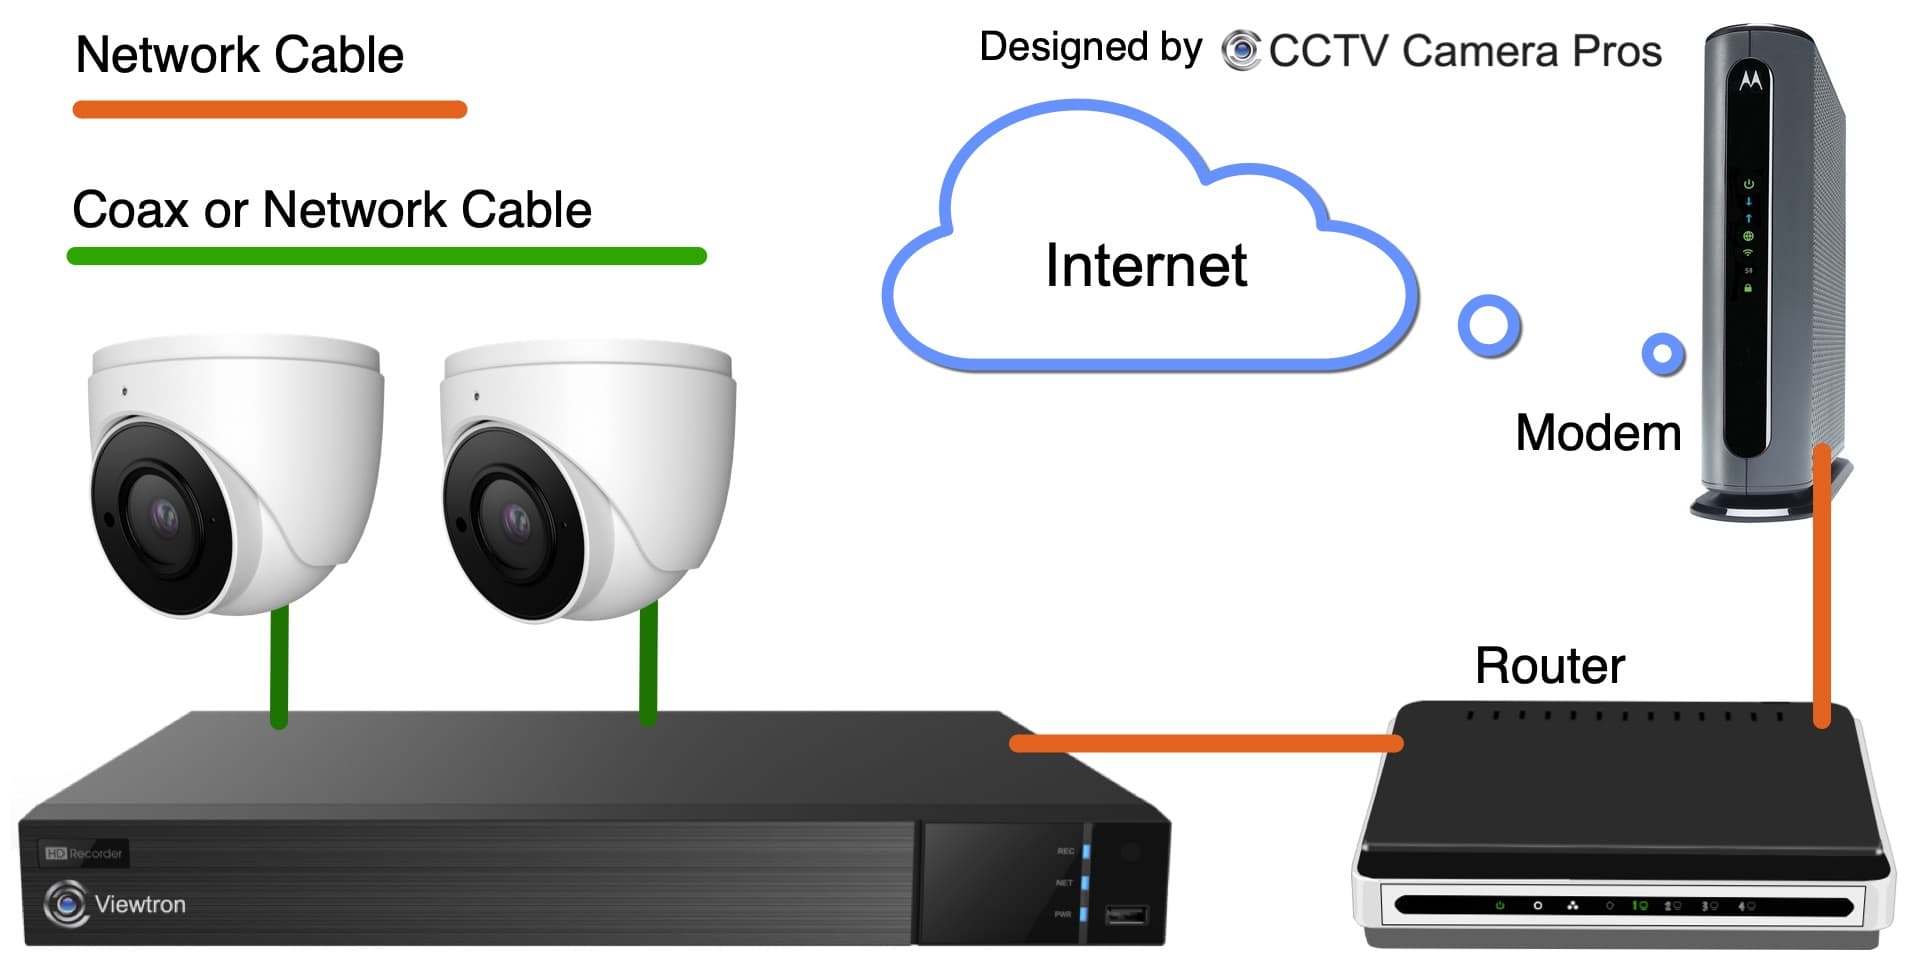
Step 1: Connect Your Security Camera to Your Local Area Network (LAN)
The first step is to connect your security camera to your local area network (LAN). You can use an Ethernet cable (also known as Cat 5 or Cat 6 cable) to connect the camera to your router, gateway, or access point. If your security camera has Wi-Fi capability, you can also connect it wirelessly to your network. However, a wired connection is more stable and secure than a wireless one.
Choosing the Right Router for Security Cameras
When selecting a router for your security cameras, consider the following key features:
- Speed: Look for a router that offers fast speeds, preferably with a Gigabit Ethernet port for wired connections.
- Coverage: Ensure the router can cover your entire area, including your security cameras.
- Security: Opt for a router with robust security features, such as WPA3 encryption and a firewall.
- Range: Choose a router with a strong signal strength to maintain a stable connection with your security cameras.

![Best Wifi Router For Security Cameras [Updated:March 2026]](https://securitiescameras.com/wp-content/uploads/2022/08/Router-for-Security-Cameras-2-683x1024.png "Best Wifi Router For Security Cameras [Updated:March 2026]")


")


")


