NETGEAR G Router Setup for Smart Home: A Guide to Seamless Connectivity
Are you looking to set up a smart home network with a reliable and efficient Wi-Fi connection? Look no further than the NETGEAR G router setup for smart home. With its user-friendly interface and easy-to-follow setup process, you can create a seamless and secure internet connection for all your devices.
Why Choose a NETGEAR G Router?
NETGEAR routers are renowned for their reliability and user-friendliness, making them an ideal choice for homeowners and small businesses. With a NETGEAR G router, you can enjoy fast and secure Wi-Fi connectivity for all your devices, from smartphones and laptops to smart TVs and gaming consoles.
Step-by-Step NETGEAR G Router Setup for Smart Home
Setting up your NETGEAR G router is a straightforward process that can be completed in a few simple steps. Here's a step-by-step guide to get you started:
- Step 1: Download the Nighthawk App
- Step 2: Unpack Your Router
- Step 3: Attach the Antennas
- Step 4: Connect Your Modem
- Step 5: Power On Your Router
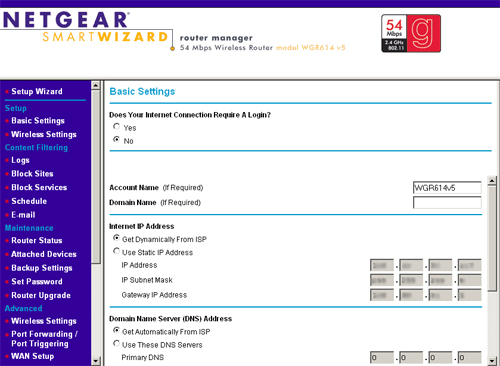
- Step 6: Access the Router's Web Interface
- Step 7: Configure Your Network Settings
Download the Nighthawk app on your smartphone or tablet to access a user-friendly interface for setting up and managing your router.
Unpack your NETGEAR G router and all the included accessories, such as the antennas and power cord.
Attach the provided antennas to your router for optimal Wi-Fi coverage and performance.
Connect your modem to the Internet port on your router using an Ethernet cable.
Power on your router and wait for the WiFi LED to light up, indicating that your router is online.
Access the router's web interface by typing the default IP address in a web browser and logging in with the default admin username and password. Change the admin username and password for added security.
Configure your network settings, such as setting up wireless networks, setting up Quality of Service (QoS), and enabling guest network access, as needed.


 - AX5400 Dual ...")


