Setup Router for VPN Connection: A Comprehensive Guide
A Virtual Private Network (VPN) connection on your router can provide online privacy and security for any device connected to it. However, not all routers support VPN connections.
Things to Consider Before Setting Up
- Check if your router is VPN-compatible and supports the VPN protocol you want to use.
- Choose a compatible VPN provider and follow their guidelines for setting up a VPN connection on your router.
- Not all routers come with a built-in VPN client, so you may need to purchase a separate VPN-compatible router or use a VPN-enabled router.
Step-by-Step Guide to Setup Router for VPN Connection
To set up a VPN connection on your router, follow these steps:
- Log in to your router's web interface using a web browser. The address is usually 192.168.0.1 or 192.168.1.1, depending on the router's configuration.
- Locate the VPN client tab or section on your router's web interface.
- Follow the VPN provider's guidelines to configure the VPN connection on your router.
- Save the changes and apply the new configuration to your router.
- Test your VPN connection to ensure it's working correctly.
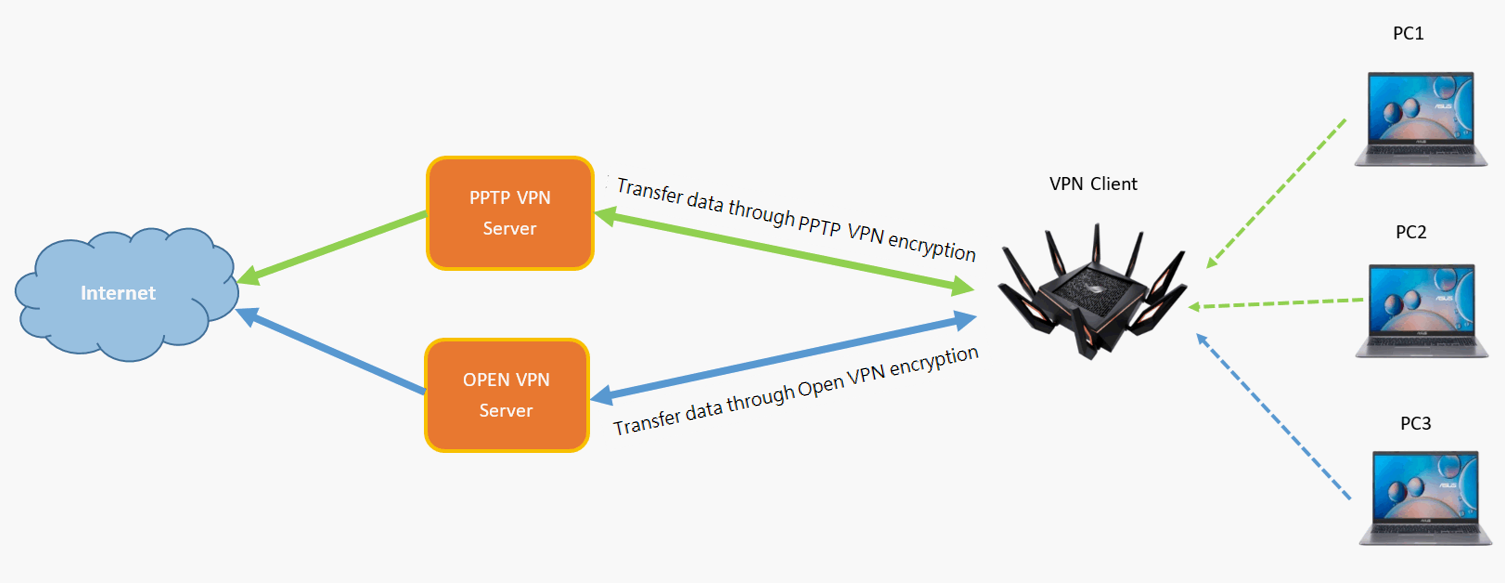
Understanding VPN Protocols and Router Compatibility
When choosing a VPN router, consider the following factors:
- VPN protocol support: Look for routers that support OpenVPN, IPsec, or PPTP protocols, as these are the most widely used VPN protocols.
- Router firmware: Some routers come with built-in VPN clients, while others require manual configuration using DD-WRT or Tomato firmware.
- Internet Service Provider (ISP) compatibility: Some ISPs lock their routers to their service, so you may need to purchase a separate VPN-compatible router.

![How to set up a VPN router [+Video] - NordVPN](https://static.tp-link.com/upload/faq/image-20220424162915-1_20220424083648d.png "How to set up a VPN router [+Video] - NordVPN")


![[Wireless Router] How to set up WireGuard® VPN server?](https://kmpic.asus.com/images/2022/08/15/e392bc2d-aace-49c9-a846-ccbd5ddf5ea7.png "[Wireless Router] How to set up WireGuard® VPN server?")
![[VPN] How to set up IPsec VPN connection in Windows 10 (Firmware ... - ASUS](https://static.mercusys.com/images/article/image-20251125112522-720251125032528.png "[VPN] How to set up IPsec VPN connection in Windows 10 (Firmware ... - ASUS")


![[Wireless Router] How to set up VPN server with port forwarding ... - ASUS](https://thebestvpn.uk/wp-content/uploads/2026/01/v2-17o996-7wjhz.jpg "[Wireless Router] How to set up VPN server with port forwarding ... - ASUS")